
5 things i would do differently in my bathroom design
As part of our renovation project, one room that needed the biggest upgrade was the bathroom. The room sits in a first floor extension completed a few years ago by the previous owners. What we didn’t realise in our quick tours of the house (the joys of trying to buy in Cambridge) was that the ceiling was far too low to house a shower. At just 2m tall, the room’s height was below standard ceiling height in the UK and meant the only solution was to raise the ceiling height of the entire extension so we could fit the shower in.
With most of our budget spent on raising the ceiling height, we had to be clever in keeping the fit out costs down. This meant making some decisions we wouldn't make in an ideal world but oh well. I am not someone that takes baths very often and I would love nothing more than a wet room style bathroom but as this is the only bathroom in the house and not our forever home, it is always best to have a bath for resale purposes. One day…
I love how our bathroom has turned out, there are so many decisions I’m pleased we made but I thought I would share some of the learnings which should help if you’re planning to renovate a bathroom in the near future. I like to test things out in my own home so I can provide the best practical advice to clients. Although this is a great way for me to evolve my expertise, it does mean our house is always in flux.
Here are 5 things I would do differently if I was starting my bathroom from scratch:
Concealed cistern toilet
When helping my clients plan their bathrooms, I always recommend a concealed cistern toilet. This is not only for aesthetic reasons but for cleaning purposes as well. They are so much easier to clean (in my opinion). As we were restricted on budget and space in the room, I decided to not invest in a concealed toilet but it is by far my biggest regret.
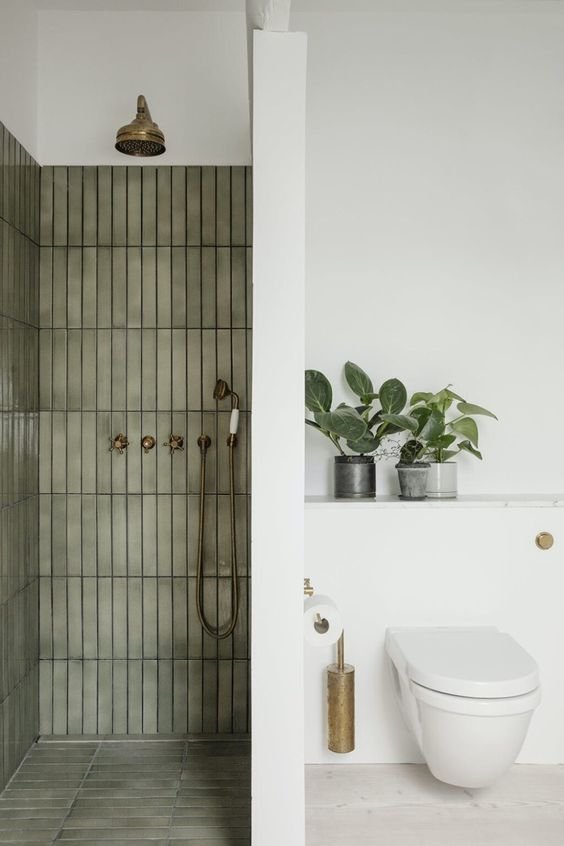
A great example of a simple concealed cistern toilet
(source: Pinterest)
Tile rest of wall at the back
When I planned this bathroom I was very conscious of how the previous tiles, despite being white, made the room feel claustrophobic and I wanted to open up the space as much as possible. This was behind my thinking to reduce the amount of wall tiles to only feature around the shower.
However, I love the sage green zellige tiles and wish I had more of the texture along the back wall to create a bold look as you walk into the room.

Paint walls in matching green limewash
As with my clients homes, I want to use as many healthy and low-carbon products as possible in my own home. One product I was sure I wanted from the outset was limewash paint. Not only does it bring texture to the room, it is completely breathable and non-toxic. None of the nasty chemical smell you get with traditional paint. The downside of limewash is that it isn't waterproof so you need to avoid areas that get splashed. In our bathroom we do get the odd splash here and there but nothing to cause issues with the wall finish. The great thing about limewash is you don’t need to paint an entire wall if you need to touch up a small section. It’s super easy to apply, I find it so much more enjoyable than using traditional paint.
For bathrooms, venetian plaster microcement is typically a better lime-based paint as it is waterproof and more durable than limewash. This needs to be done by a qualified microcement installer and can be anywhere in the region of £100 - £150 per sqm.
Although I love the colour used (Bone by Bauwerk), I have been toying with the idea of going over with a grey-green wash to complement the tiles for a dramatic look. Initially, I was very conscious of creating a neutral base for the home as we know we won’t be here for the long term but the more I live with it, the more I’m inclined to be bold. With so much other DIY and work to do on the house, this is lower down on my priorities but let’s see what happens later in the year…
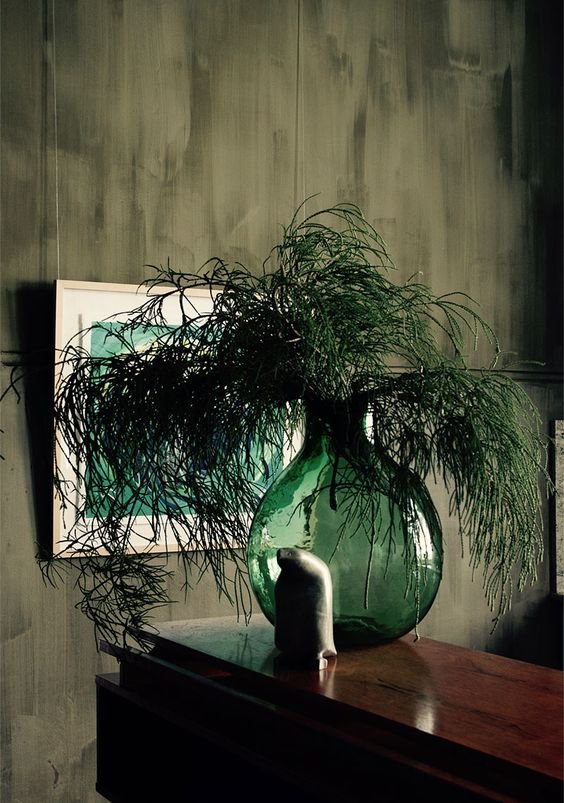
Currently obsessing over this green limewash from Bauwerk
If you’re looking to use more sustainable materials in your home, like limewash, get in touch today for a chat about how we can help you on your healthy home journey.
Use a handmade sink
When I went to Morocco in November in 2021, I fell in love with the craftsmanship and materials. Suffice to say that by the end of my 9 day trip, I had more than filled my suitcase and hand luggage quota. One of my favourite purchases was a green tamegroute sink I had bought for our future downstairs bathroom. I walked through the airport hoping no one would notice my hand luggage bag was significantly heavier than the 10kg allowed, trying to hide it from airline staff and walk like I wasn’t carrying a giant weight. We haven’t added in the downstairs bathroom yet but the sink is sitting in our spare room, waiting for its day to shine.
On my first day in the medina I spotted an intricately patterned brass sink, as we were part of a group I wasn’t able to stop in the shop but I made a mental note to return later in the trip. I never did return - turns out its very difficult to find the same place twice in the medina! I love to use handmade and pre-loved items in my designs and this is one that slipped away.

Ask builders to set in pipework
This is a lesson learnt in communicating with tradespeople. As part of our conversations with the builders before work commenced, we had agreed they would set the pipework back into the wall so we didnt have a box section encroaching on the floor space. As we were project managing from afar and not on-site everyday, this wasn’t done and we were left with an ugly box section to deal with. Luckily we had left over wall tiles which we used to cover this up and create continuity in the bathroom design.
Top tips
Setting a work plan with your builders
When first engaging with tradespeople, be extremely clear with the tasks you want included in their quote and make sure this is explicitly included in their documentation. This is why we create a full scope of works for each tradesperson on our projects and ask them to sign contracts before starting. There are so many decisions to make when renovating, the last thing you want is added stress with work not being completed as expected.
If you’re about to start a home renovation project, get in touch for a complementary chat about how we can help you work effectively with tradespeople.
Create a clear design
Space planning is a key component of a successful design. Draw out the room and the required furniture to work out best layout and this should help inform the rest of the design process. Pick out all the fixtures and finishes ahead of the work to avoid any less than ideal last minute decisions.
Think about cleaning
This is something I bring up with clients a lot! Bathrooms are one of those rooms that can get messy really quickly so I recommend design choices that not only help to keep bathrooms clean but keep them looking new for years to come. Concealing pipework, reducing grout lines and creating bespoke storage are all key considerations when wanting to create a bathroom to last.
If you’re planning a bathroom refurbishment, we offer a complimentary call to discuss your project. Get in touch here